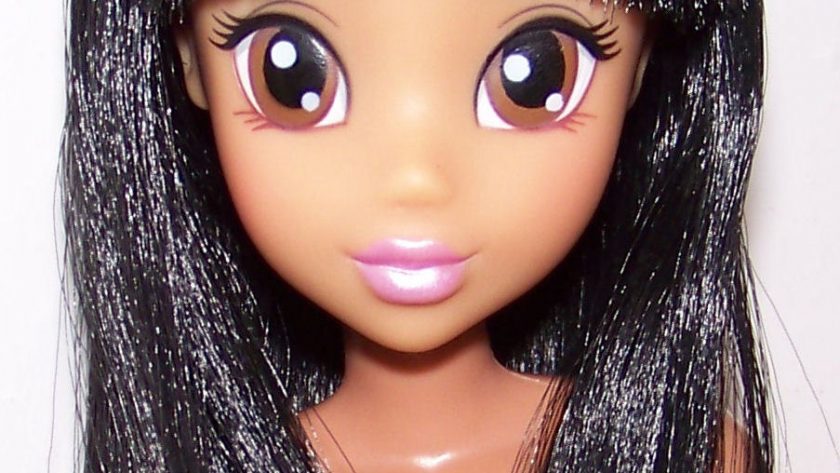
This was my latest comission, I was sent the anime picture and was told it was going to be a Star Darlings Sage so I measured everything on my own Sage (from @dollsahoy thankyou! – they didn’t get a release in france outside of disney stores as far as i can tell) then was asked if I’d reroot a MTM Curvy yoga (the strawberry blonde Neysa) which I turned down //which is huge for me// because they have the worst screening then was sent a photo of a WITCH doll which seemed 1/6th to me, I figured they were MyScene size on 11? bods… so yeah sure!

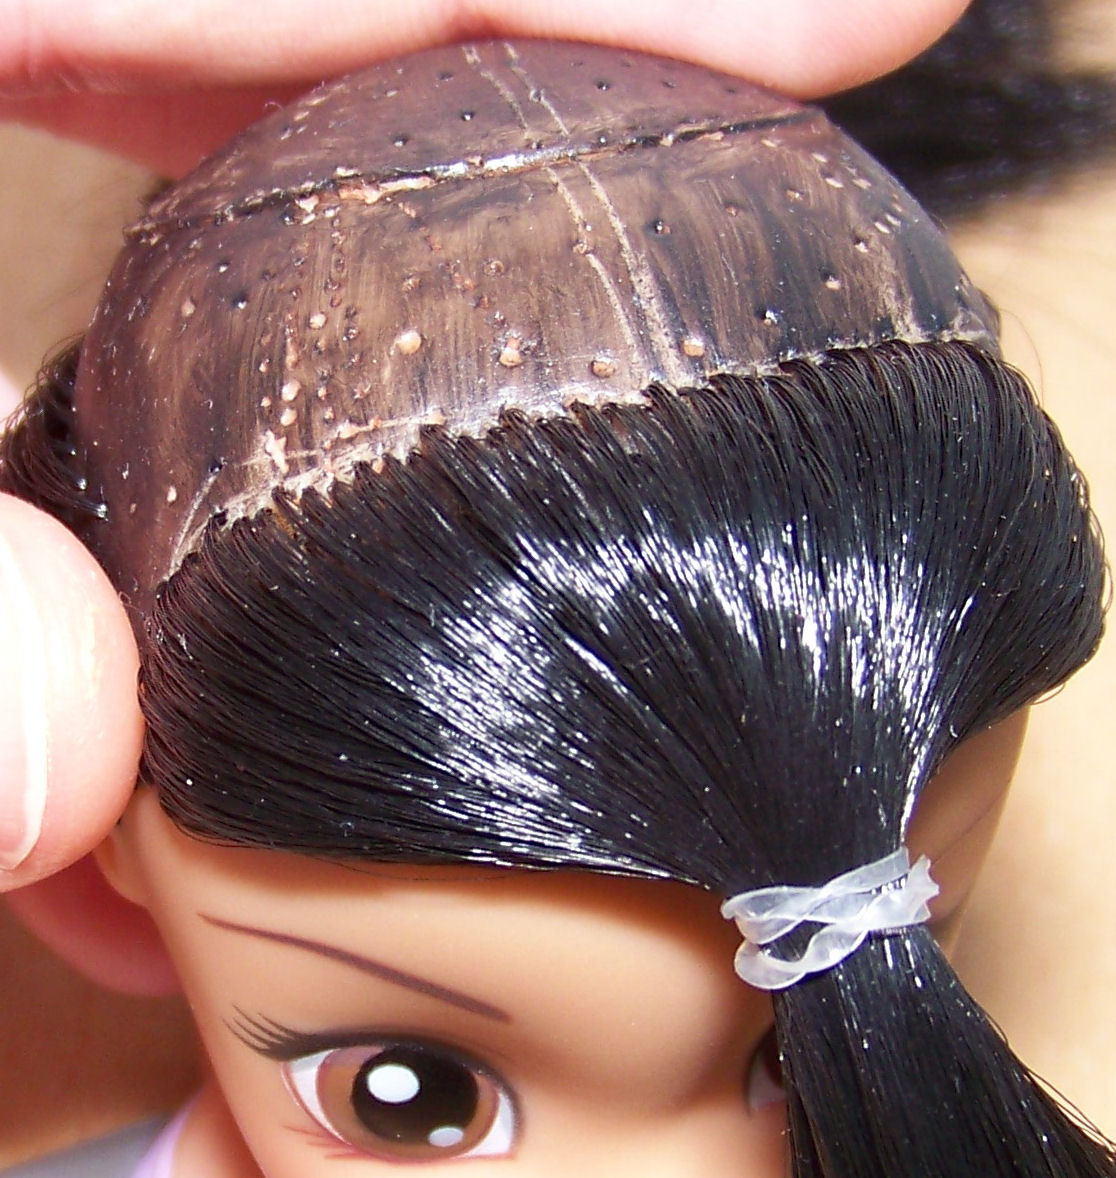
Anyway she arrives and I have a small freak out because the head is bigger than expected and I’m not sure if I have enough black, it’s been precut for a doll with a different head size and i’m not sure how to space the plugs. She’s a 6? head size around the edge but quite a deep dome so at least an hours extra work than a LIV (slightly smaller head size and flatter dome).


The original has horrid nylon that needs nail scissors to cut without choking so no going on the original plug layout. Thankfully we’re not working over the original parting because that’s swiss cheese. I’ve been having an ongoing anxiety attack for days so this is just an unexpected set of calculations that makes my head spin and BSOD for a while. She’s cute, that helps me visualize an end result and feel better about this. The Liv she’s been sent with is slightly too dark (a beach doll?) so i’ll discreetly swap it out for one I have in my To Sell pile from back when I was angling to save up for a Pullip Batgirl (tan version) – her price skyrocketed after release so I’ve put that grail firmly in the “buy only if spotted under x price” pile, as you do. OK OK, back to the process…
I take photos of problem areas and put the head in the microwave submerged in a mug of water for 4 minutes. don’t touch until she’s fully chill. Do NOT do this with Integrity Toys, vintage dolls or latest fashionistas: the ITs have pearl/shimmer finishes that go dull under heat, vintage dolls and 2019 fashionistas have decals or ink that can be altered or melted by heat, you’ll want to put your doll head on a stick and dip only the dome into a pan of boiling water until the vinyl reshapes. This is a sturdy playline doll with solid facepaint and I still won’t touch it until everything is completely cooled down.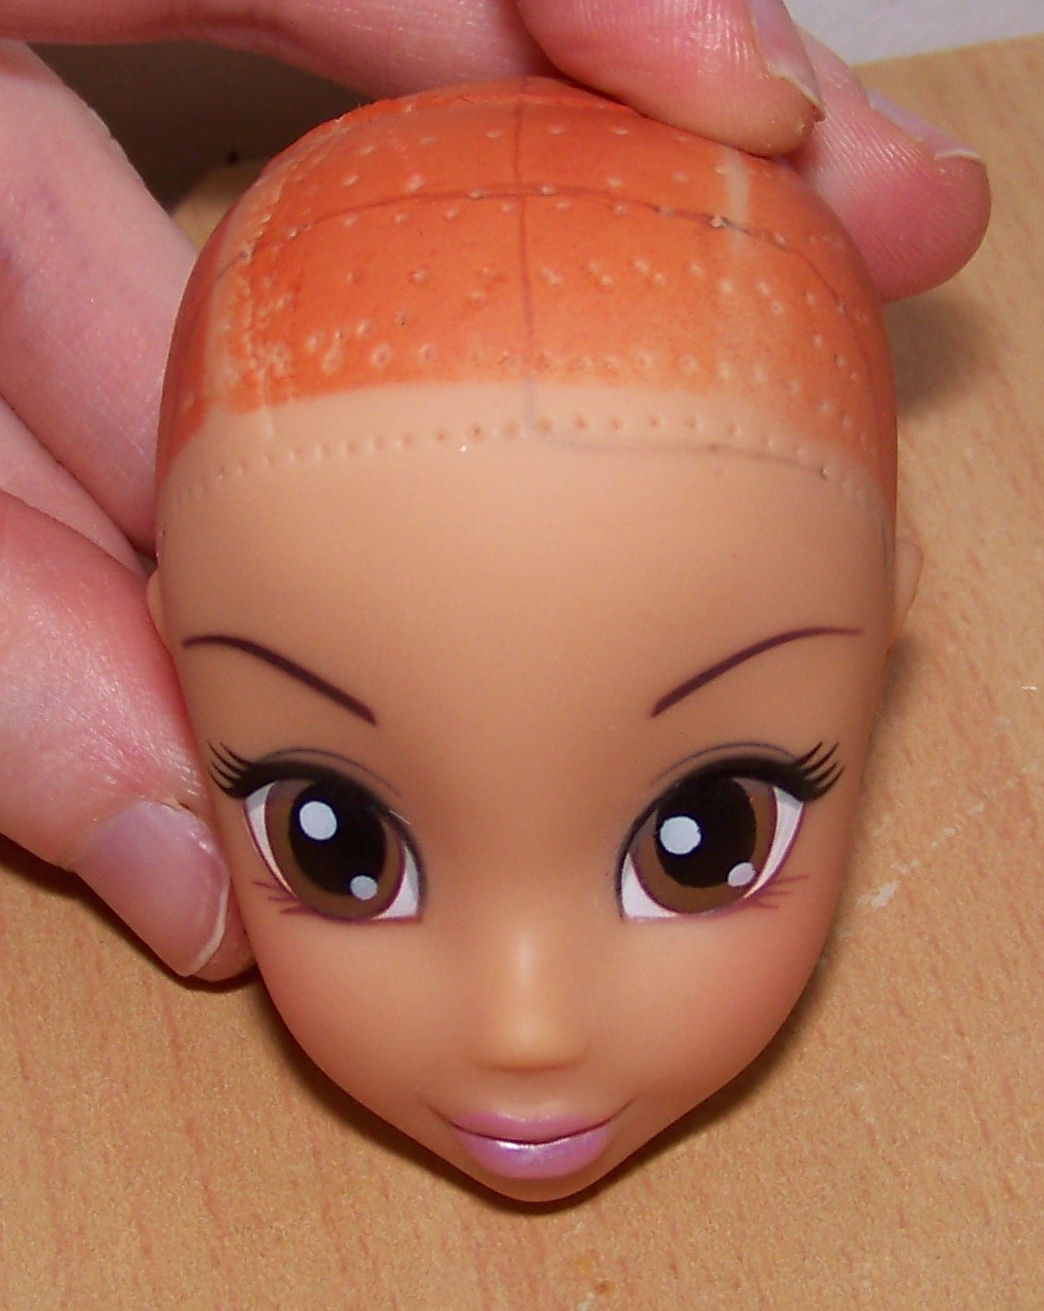
Then apply black acrylic paint and pull my brush in one direction only to keep part of the plugs flesh toned (ie visible), then apply undiluted acrylic matte sealant (anything else gets tacky). Leave to dry for two hours.

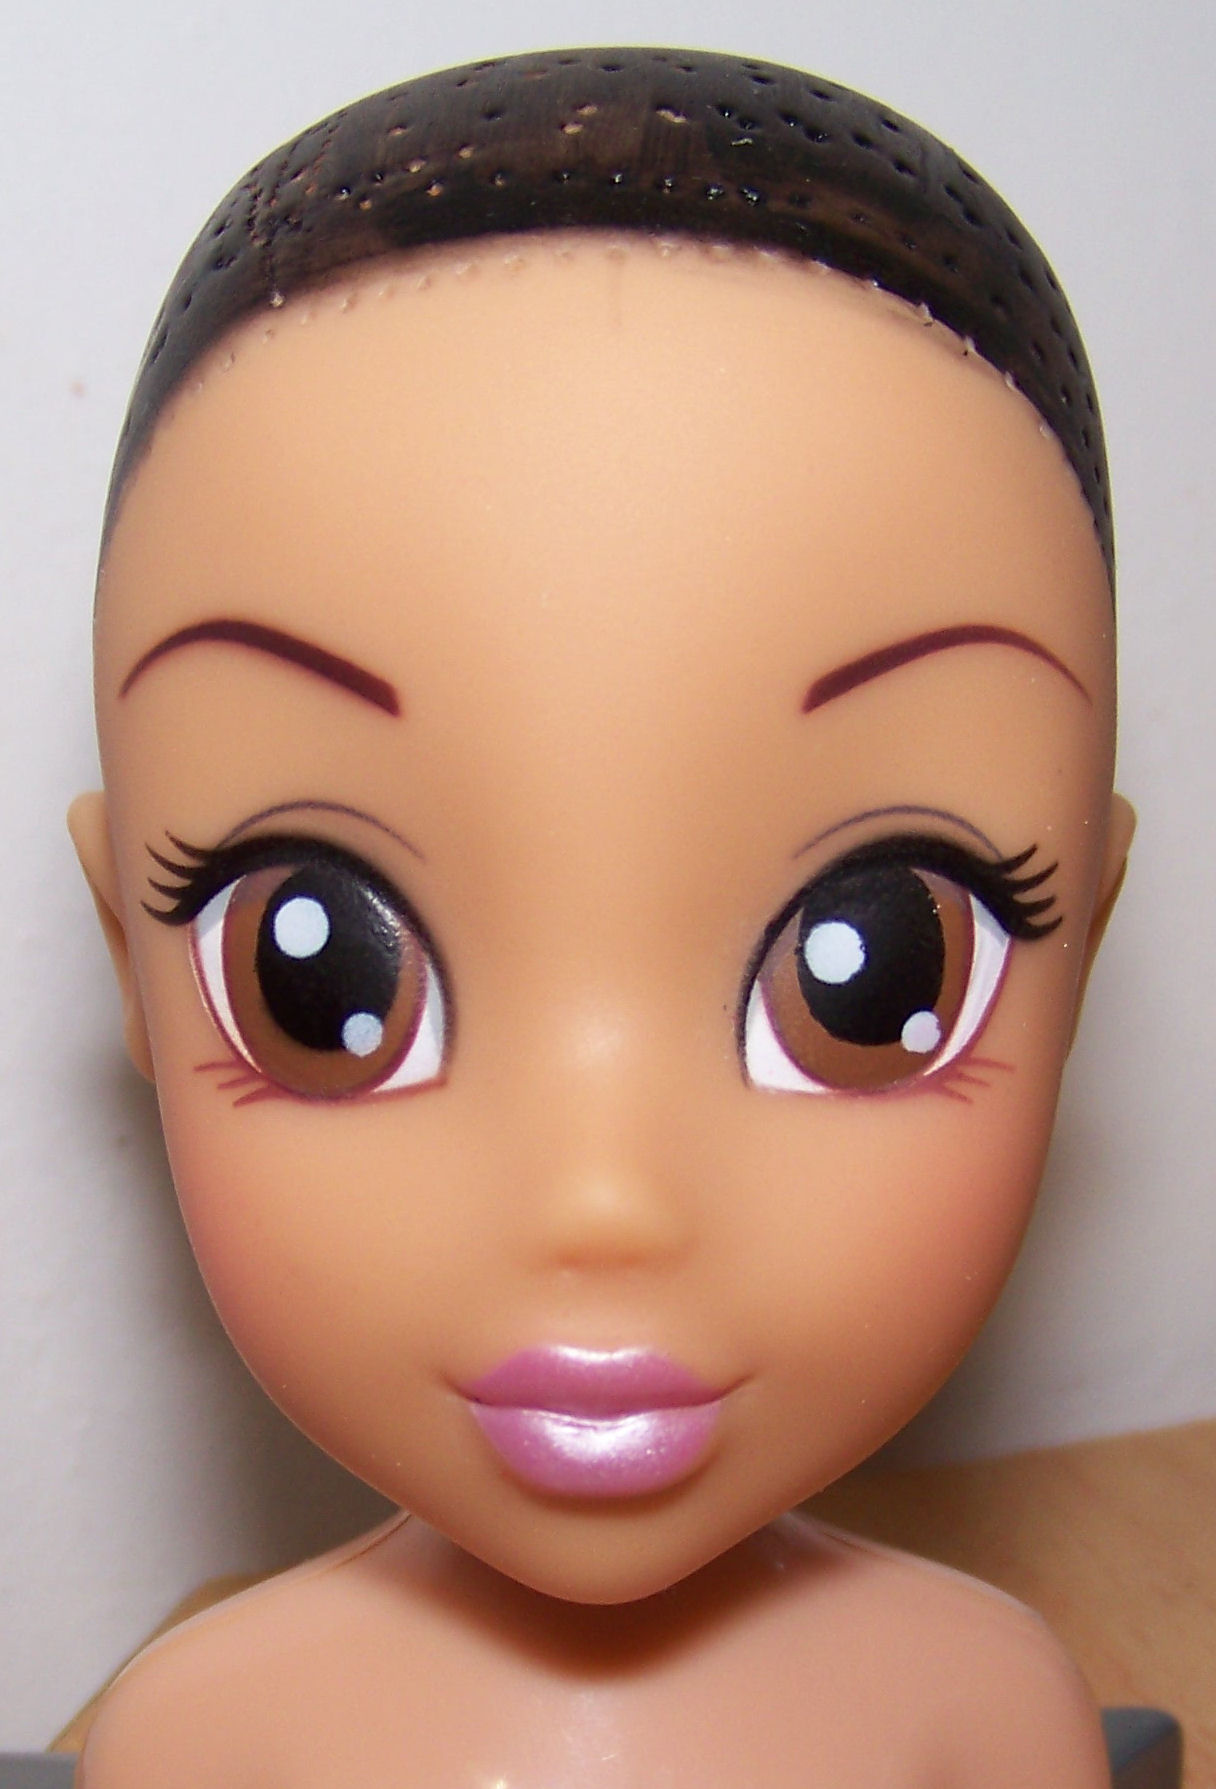
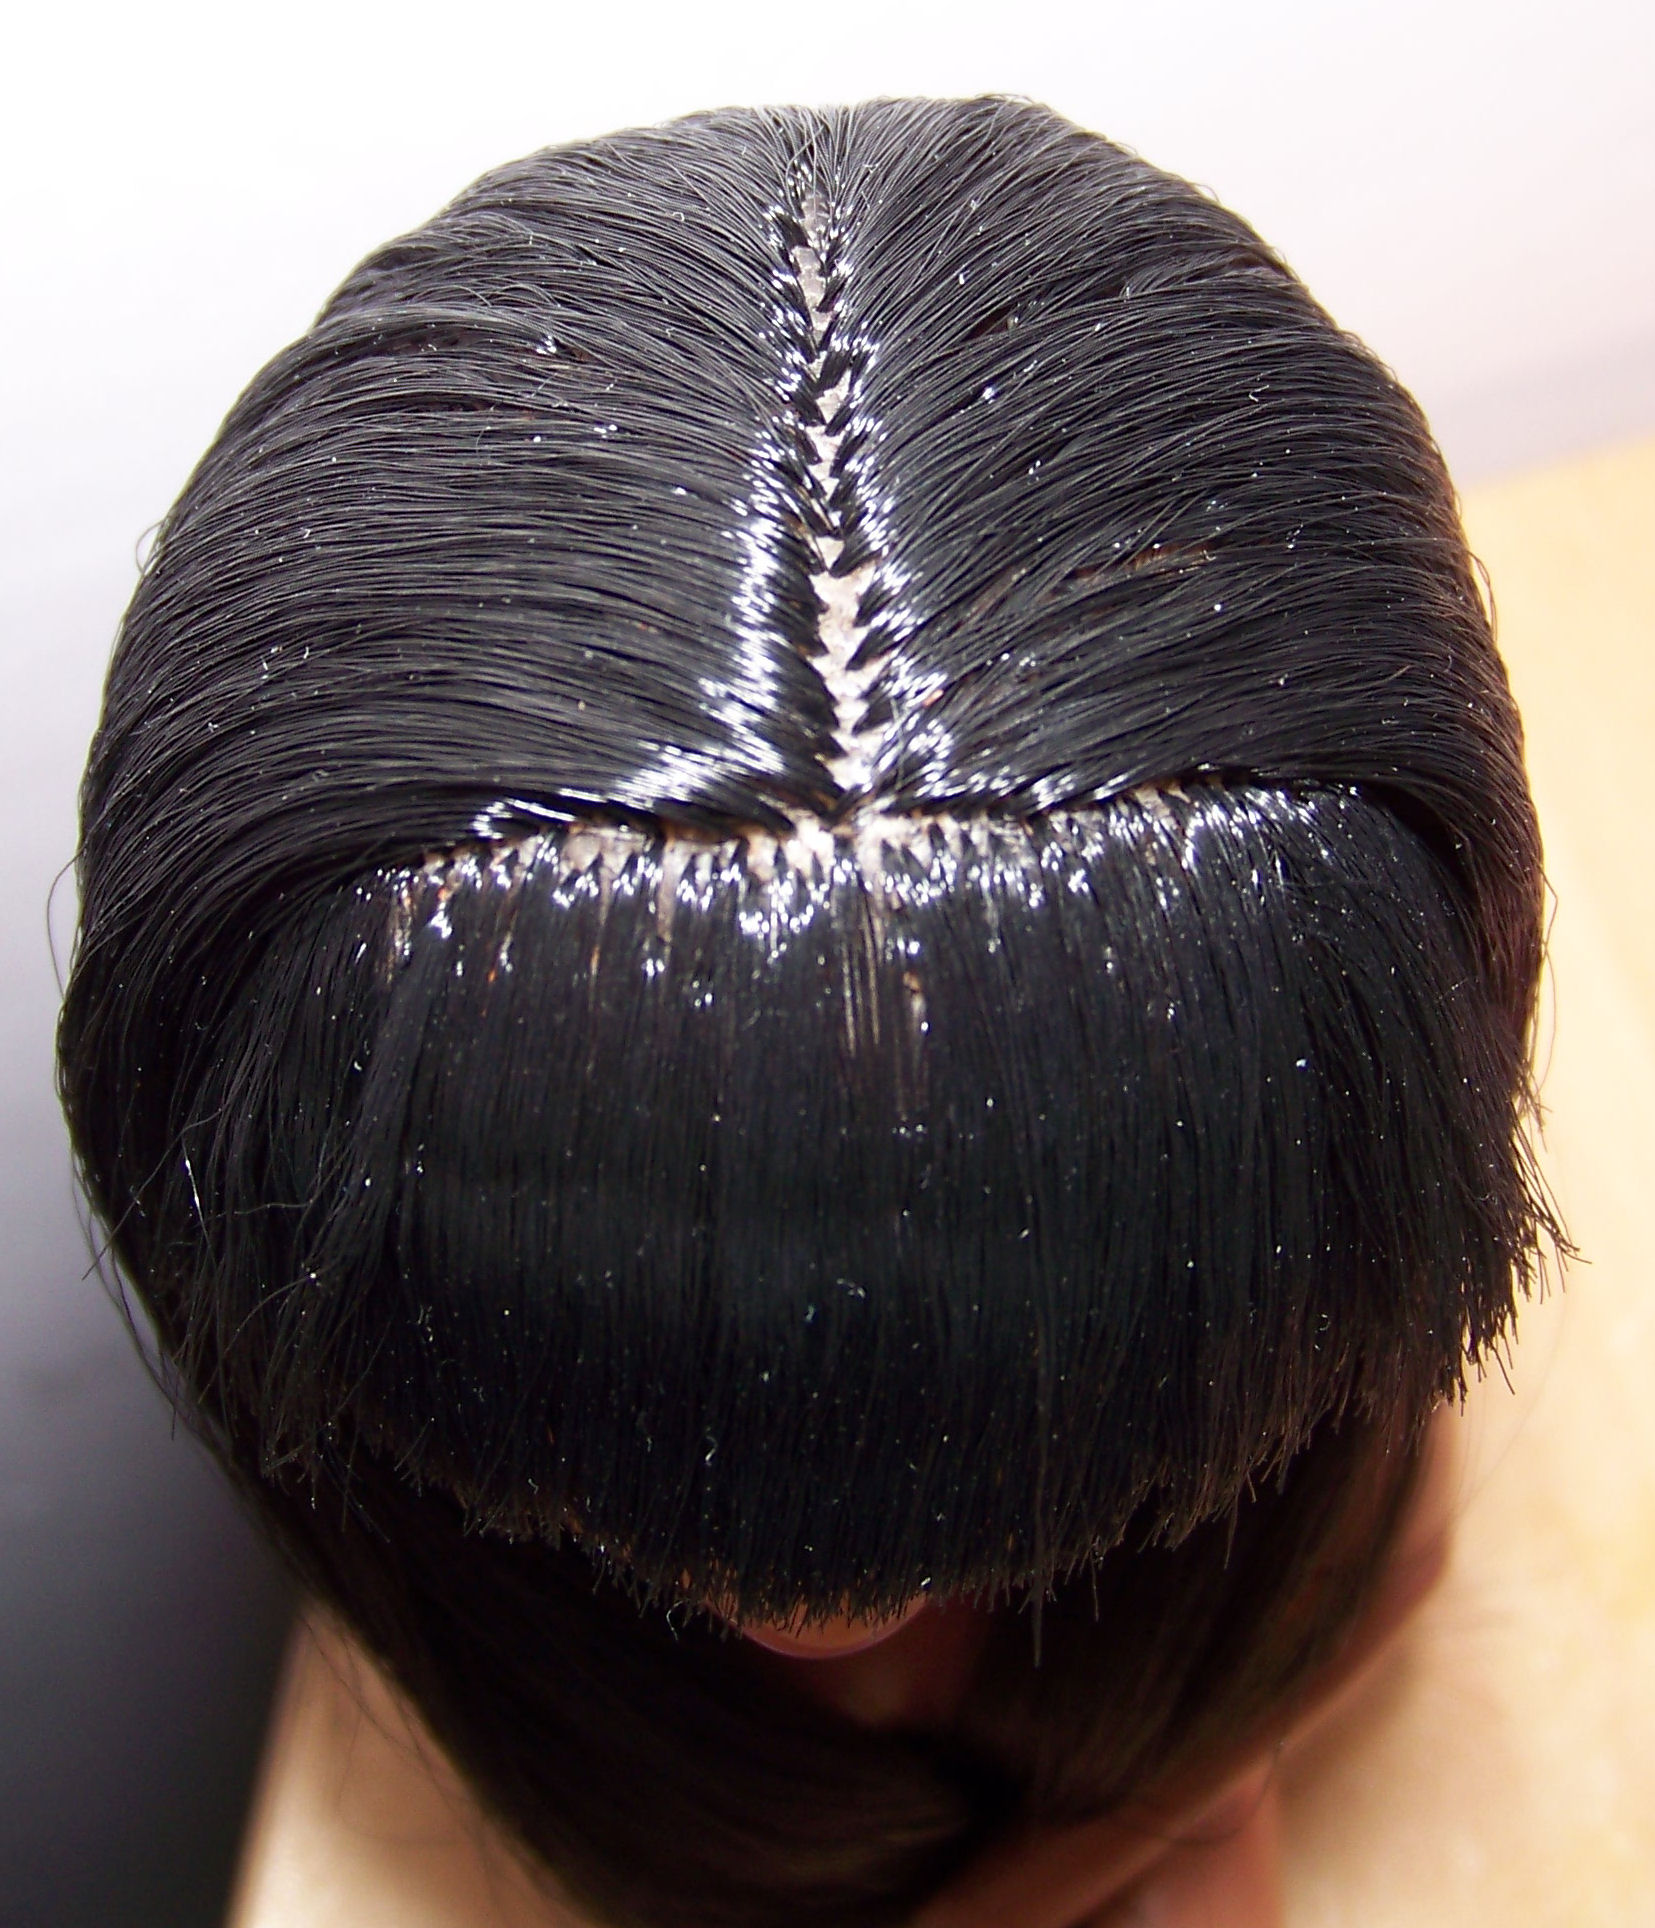
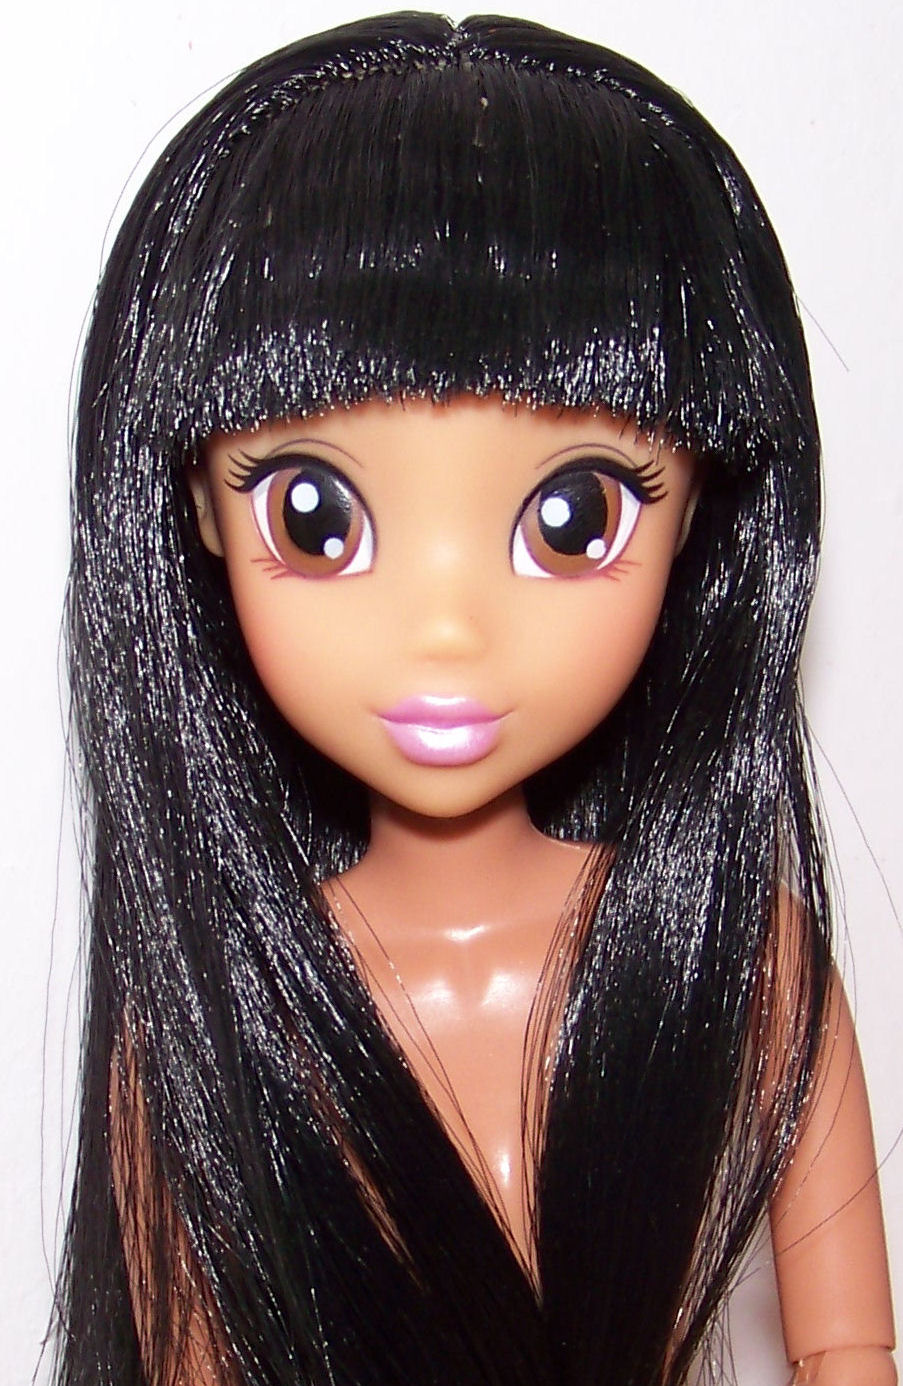
Scratch in the markings for the partings with a needle (middle and fringe/back of hair). As you can see, these got adjusted as the head came together.

She needs to look asian not caucasian with dyed black hair so not too thick on top and a rounded heavy parting. I decide on a large curved shaped fringe area – it’s 1.50cm long and extends to the edges of her eyebrows. I do not like triangle shaped bangs (as seen on Draculaura), they are too easy to mess up, same with flat (two row) thatched bangs on Bratz. To be fair, I avoid bangs whenever possible, I don’t like static un-restylable dolls, I hope they get played with. A curved fringe can at least get put back into place quite easily instead of having to lay out the individual hair plugs just right in a messed up triangle fringe, tie it all down then boil it back into place then gel. nuh uh.
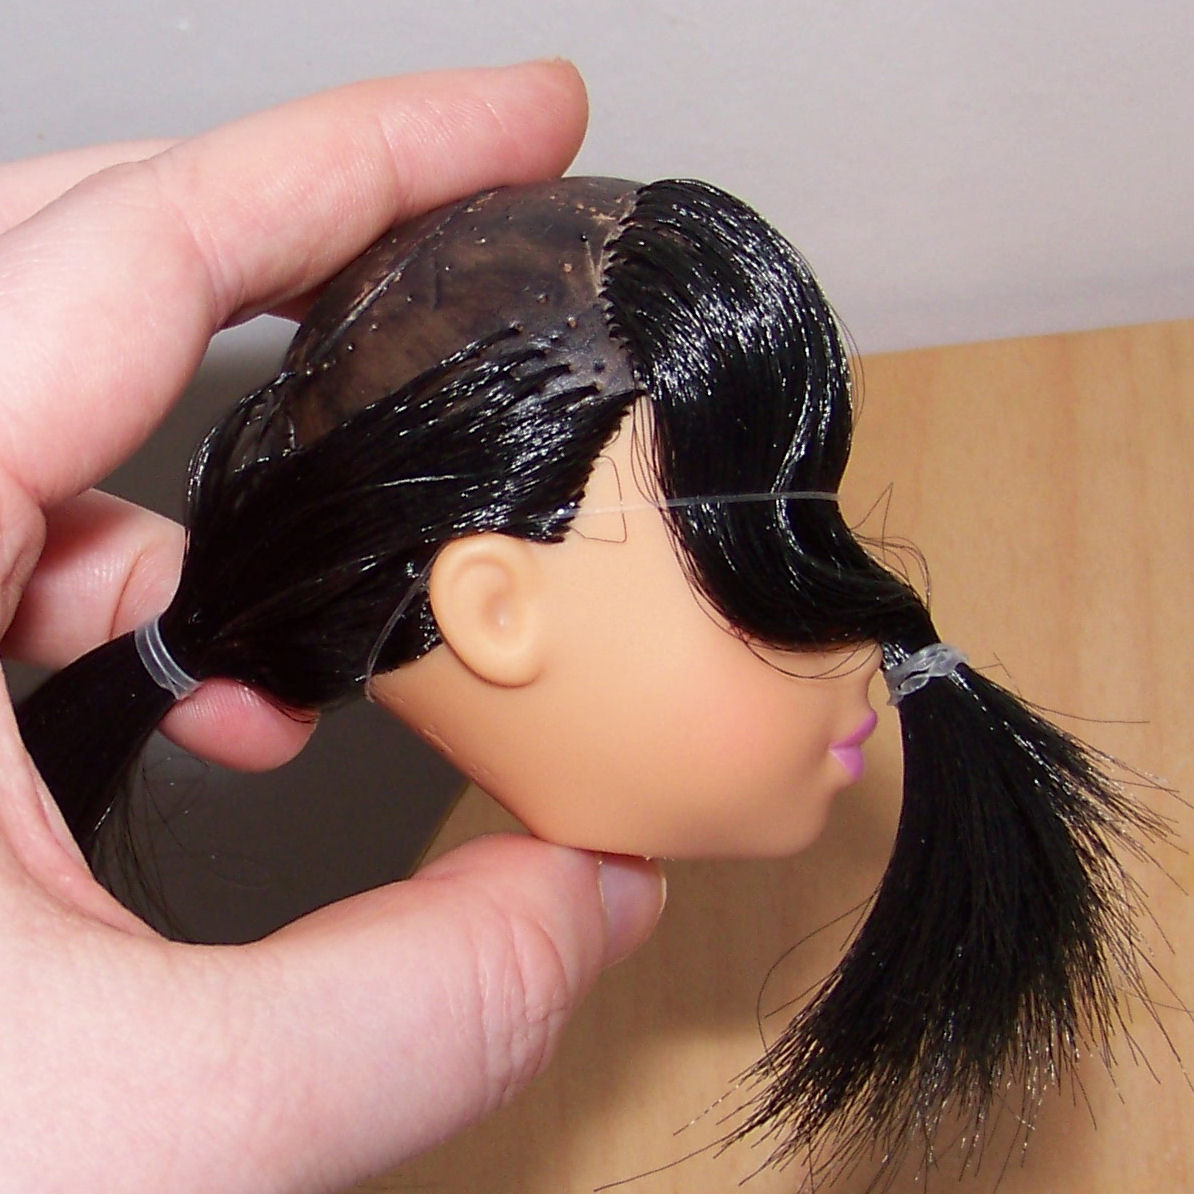
Unsure of how much hair to use on this head size, I rooted in rows of plugs 5mm apart, 8mm between lines then went back at the end of the reroot to fill in empty areas as it wasn’t thick enough. ended up with a criss cross design of about 5-7mm between plugs with very tight edges along the front lines and partings.
I’ve taken overexposed photos to show the plugs, it looks neat enough to not be thatched with the black paint. I don’t thatch unless paid extra to.I’m a perfectionist but not “two+ extra unpaid hours” perfectionist LOL.
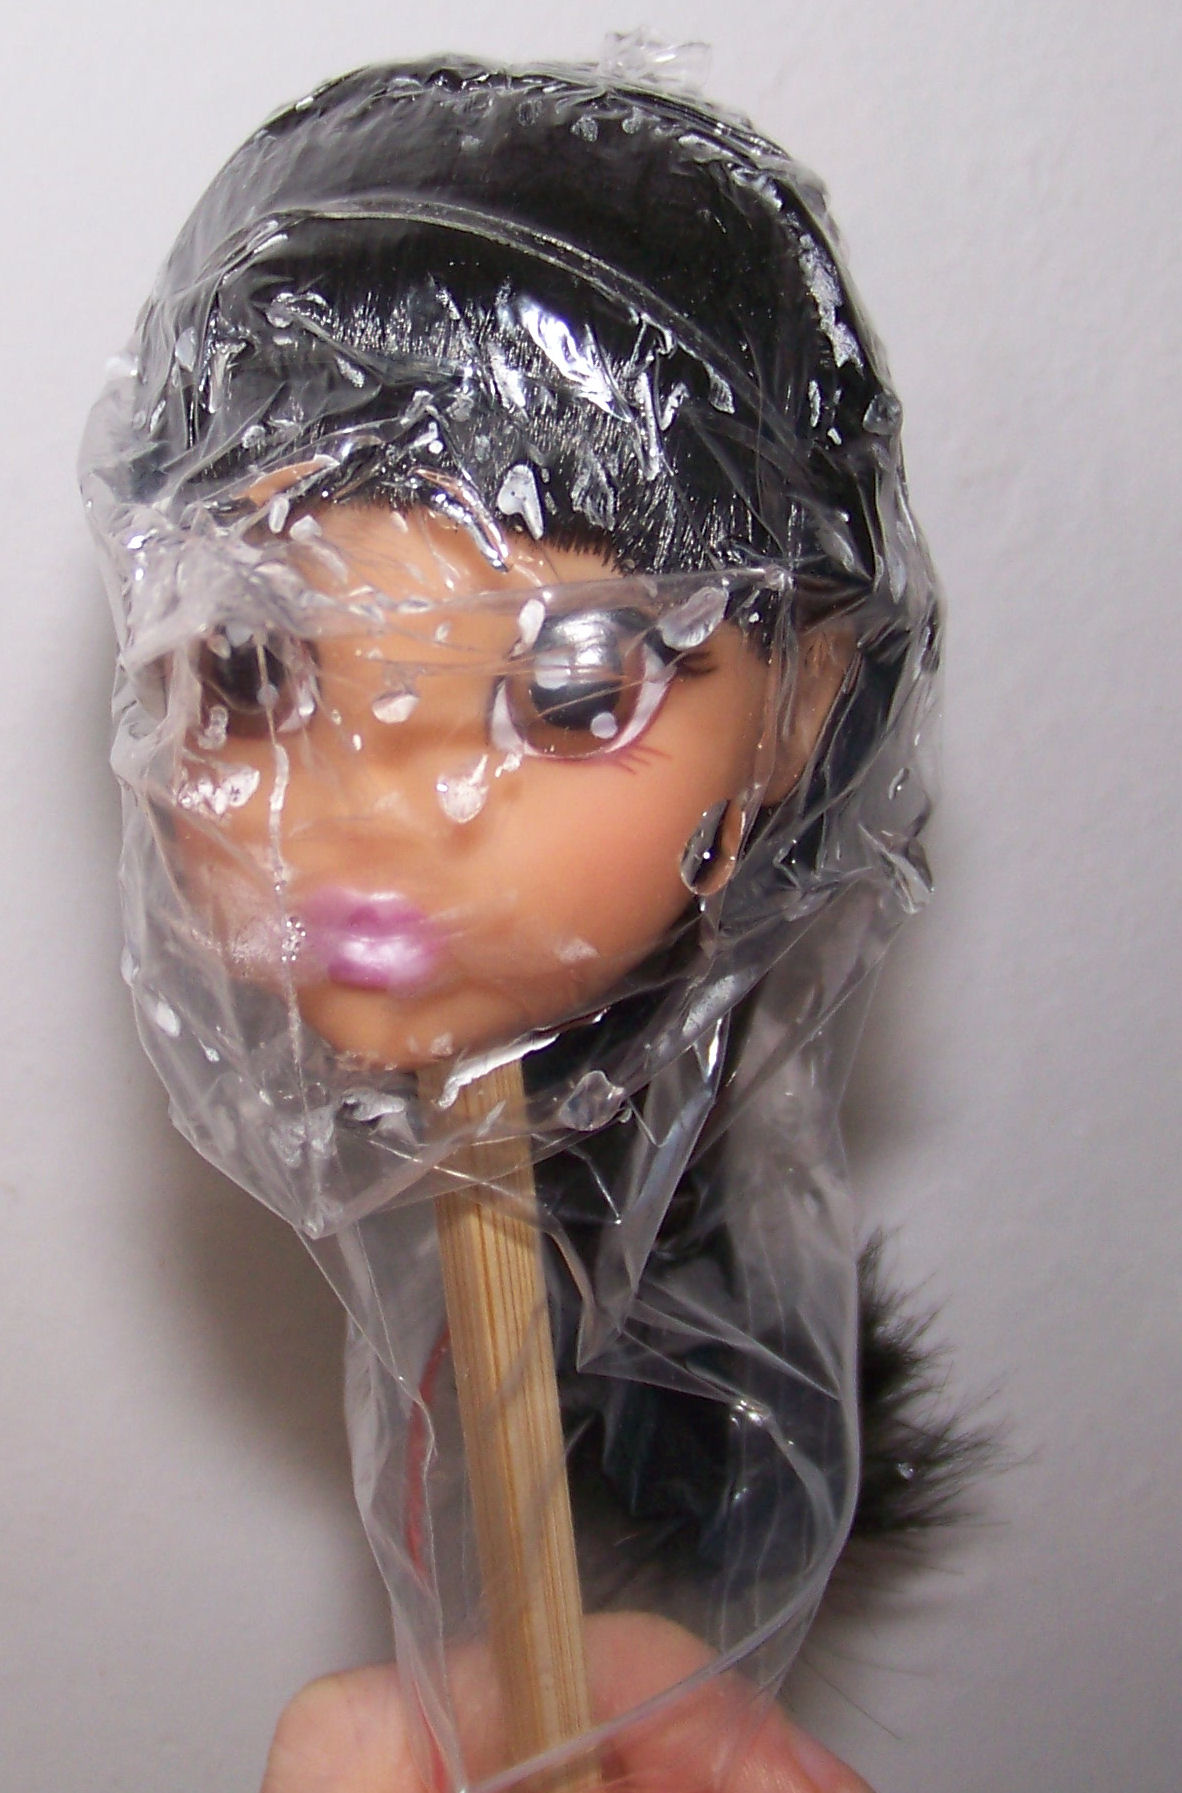
Now to heat seal the shape of the hair without damaging the water soluble acrylic paint/sealant: you tie up the hair just right, pop the head in a baggie, put a chopstick in the head to push down because or else it’ll float and put it in boiling water, the elastics will snap but the bag sort of sticks to the shape of the head so it keeps the shape.
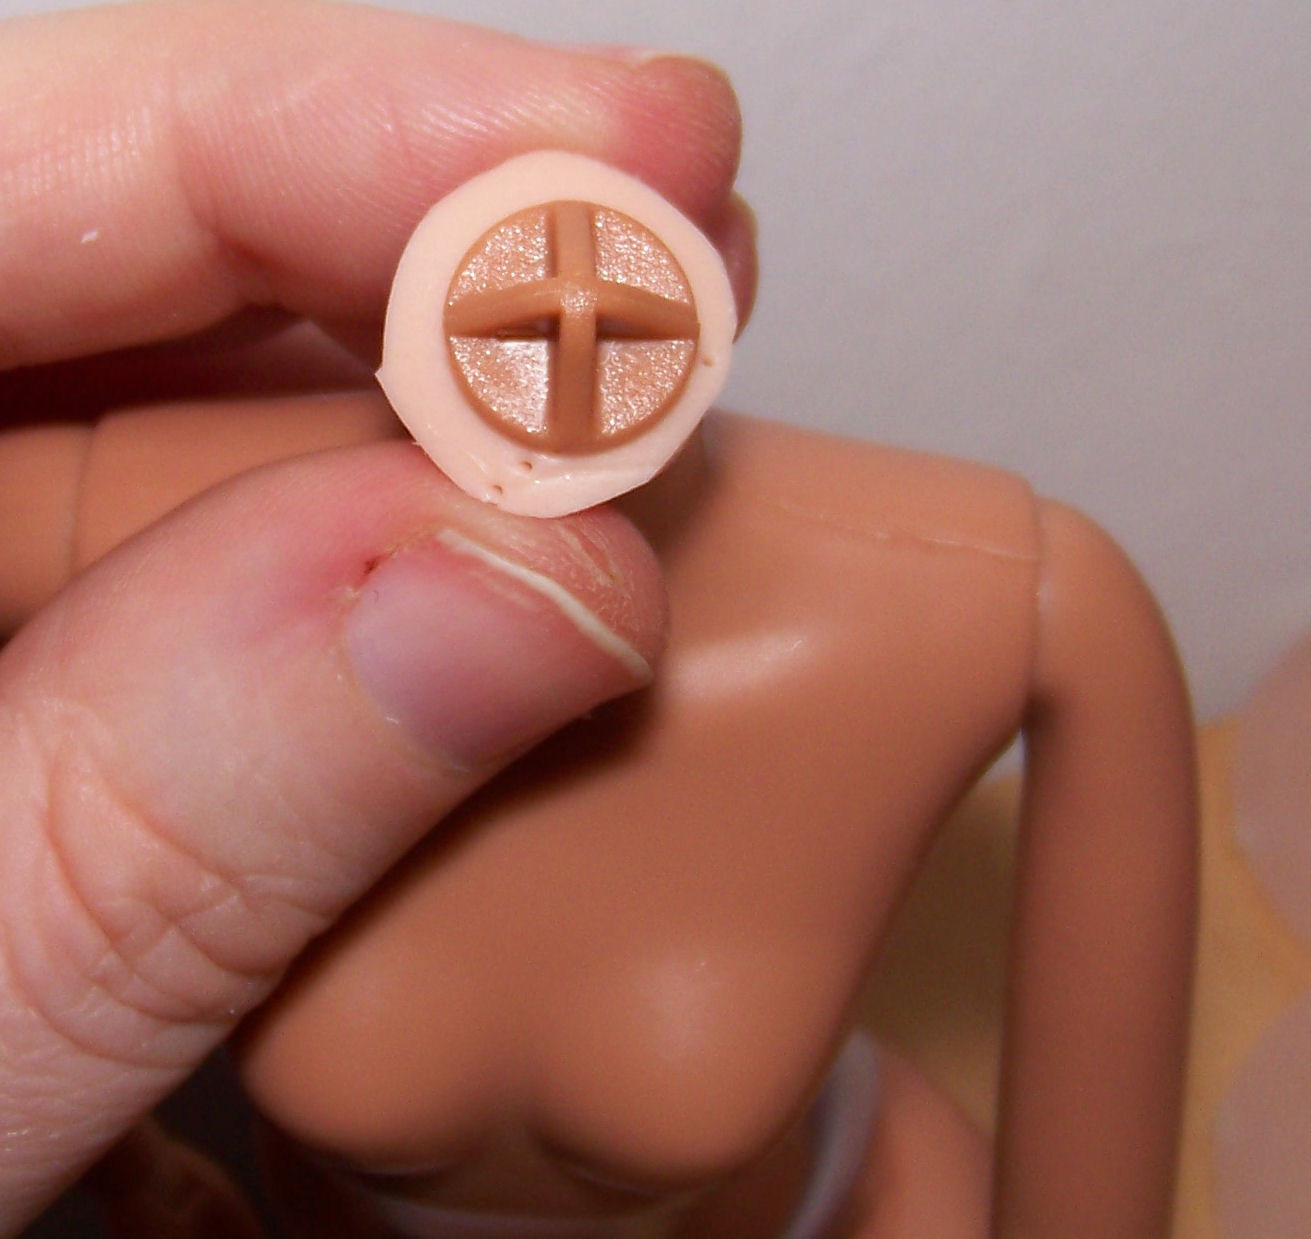
Finally, the WITCH head hole is slightly large on a Liv bod so I made a washer from the vinyl scalp of a clone, squeezed it over the anchor then pushed it all into the head. Full movement without wobbles. Thankyou for your sacrifice ugly barbie clone, your neck went to humblezombie and your scalp’s bald patch to this commission.
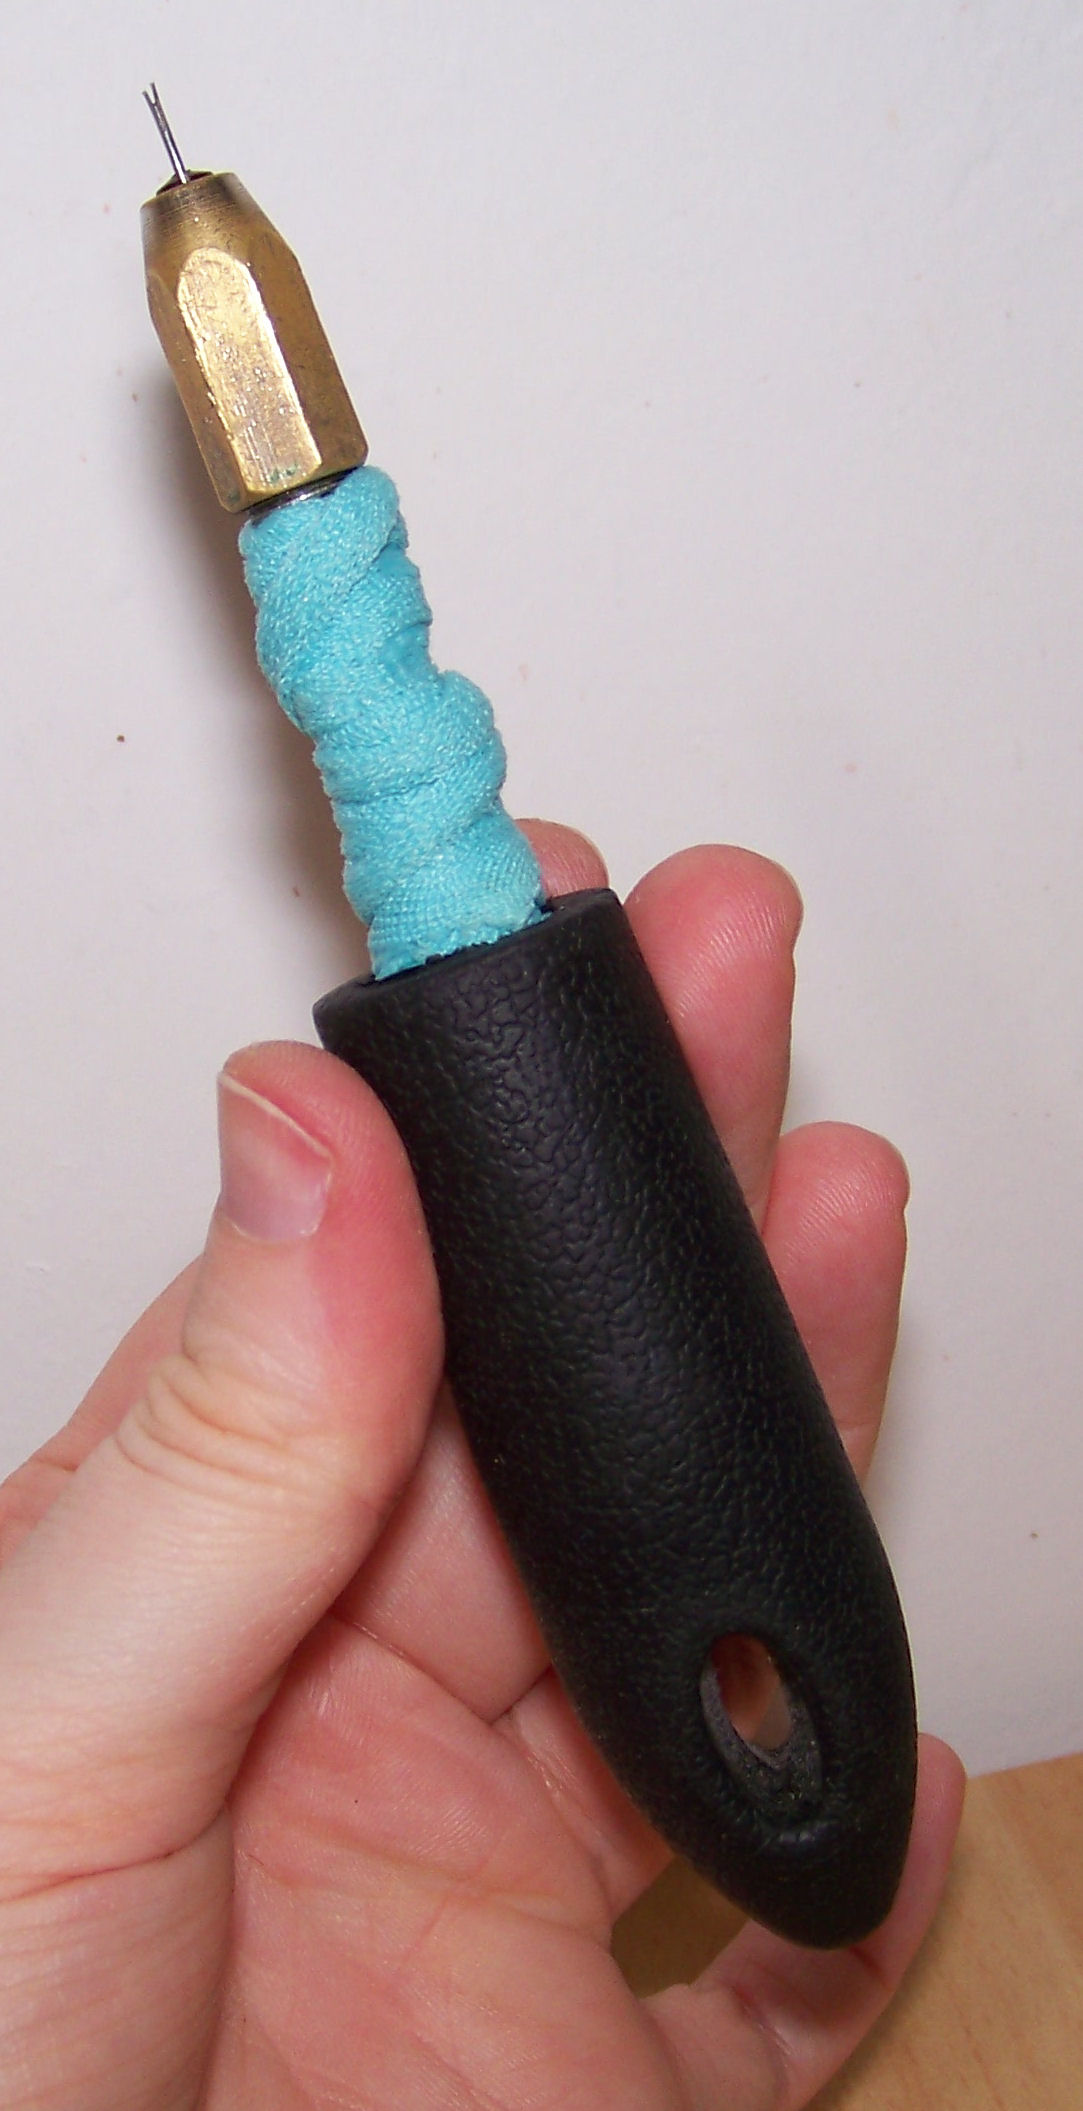
This my new reroot tool handle, nicked from a broken kitchen tool ^___^ so it’s a pin vise wrapped in washable stretch fabric stuffed into a proper rubber handle now. Finally getting comfy =p (not that my shoulders aren’t screaming at me for this).